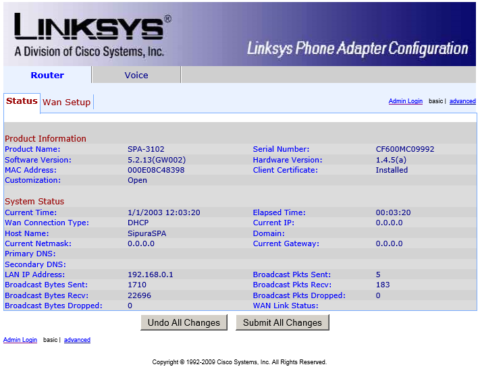
This guide shows you how to configure a Linksys SPA-3102 for use with your OntheNet VoIP service.
When to use this guide
All equipment that is supplied by OntheNet is pre-configured therefore in most cases you will only need to follow the first part of this guide to the connect the ATA to your modem.
The other sections of this guide may be useful when:
- You have performed a factory reset and need to completely reconfigure the device.
- You have purchased the device from someone else and need to configure it for your OntheNet service.

1. Power off your network devices, including your modem and PC.
2. If you have traditional phone service, connect the RJ-11 phone cable (included) to the SPA-3102 LINE port and your telephone wall socket.
3. Connect one end of a different RJ-11 phone cable to the SPA-3102 PHONE port. Connect the other end to your analogue telephone.
IMPORTANT: Do not connect the SPA-3102 PHONE port to a telephone wall socket. Make sure you only connect a telephone or fax machine to the PHONE port. Otherwise, the SPA-3102 or the telephone wiring in your home or office may be damaged.
4. Connect one end of an Ethernet network cable (included) to the ETHERNET port on the SPA-3102. Connect the other end to the Ethernet port on your PC.
5. Connect one end of a different Ethernet network cable to the INTERNET port on the SPA-3102. Connect the other end to your broadband modem.
6. Power on the broadband modem.
7. Connect the SPA-3102 to mains power using the included power adapter. The power LED on the SPA-3012 will light up.
8. Power on your PC.
Please note: All equipment that is supplied by OntheNet is pre-configured which means you only need to follow the process above to connect the ATA to your modem. If you have reset the device or purchased it elsewhere please follow these steps to configure the ATA with your OntheNet user details.
1. Connect the ATA to your modem (as above).
2. Log in to the device as follows
- Type 192.168.0.1 into a web browser to bring up the log in page. If this does not work you need to find out the correct IP address which you can do from the handset. Dial **** on the telephone (there will be no dial tone) and then 110# for the IVR to read back the IP address. You can also use the command prompt within windows and type “ipconfig”, and use the default gateway address.
- The SPA3102 by default does not require username and password to log in to. Click on admin login and then advanced.

3. Click on the Voice tab, select SIP and configure the settings as follows
4. SDP Payload Types:
- G729a Codec Name: G729(remove the a on the end)

5. NAT Support Parameters:
- Handle VIA received: Yes
- Handle VIA rport: Yes
- Insert VIA received: Yes
- Insert VIA rport: Yes
- Substitute VIA Addr: Yes
- Send Resp to SRC Port: Yes
- Click Submit All Changes

6. Select Line 1 tab along the top and configure the settings as follows
7. NAT Settings:
- NAT Mapping Enable: Yes
- NAT Keep Alive Enable: Yes

8. SIP Settings:
- SIP Transport: UDP
- If you are configuring Line 1
- SIP port: 5060
- EXT port: 5080
- SIP Proxy Require:
- If a personal prepaid service enter: sip.onthenet.com.au
- If a business service enter: sipb.onthenet.com.au

9. Proxy and Registration:
- Proxy:
- If a personal prepaid service enter: sip.onthenet.com.au
- If a business service enter: sipb.onthenet.com.au
- Register Expires: 900
- Use DNS SRV: Yes
- DNS SRV Auto Prefix: Yes
- Proxy Redundancy Method: Based on SRV Port

10. Subscriber Information
- User ID:
- If a personal prepaid service enter the Line ID/User ID from your OntheNet VoIP Service Details
- If a business service enter the SIP Trunk ID from your OntheNet VoIP Service Details
- Password: enter password
- Use Auth ID: no

11. Audio Configuration:
- Preferred codec: G711a
- Second Preferred codec: G729a
- Third Preferred codec: G711u

12. Dial Plan:
- Change Dial Plan to the following. This will reduce the delay after dialing a number before the call goes through.
(*xx|000S0|112S0|123S0|121S0|1223S0|1234S0|1100S0|600S0|900S0|09xxxxxxS0|13[1-9]xxxS0|1[38]00xxxxxxS0|[2-9]xxxxxxxS0|0[234578]xxxxxxxxS0|190xxxxxxx!|xx.) - Click Submit All Changes

13. Click on the PSTN Line tab and configure the settings as follows
14. Proxy and Registration:
- Register: no

15. Dial Plans
- Remove the existing plan in Dial Plan 2 and replace with:
(*xx|000S0|112S0|123S0|121S0|1223S0|1234S0|1100S0|600S0|900S0|09xxxxxxS0|13[1-9]xxxS0|1[38]00xxxxxxS0|[2-9]xxxxxxxS0|0[234578]xxxxxxxxS0|190xxxxxxx!|xx.)
16. VoIP to PSTN – Gateway Setup
- Line 1 Fall back DP: 2

17. PSTN to VoIP – Gateway Setup
- PSTN to VoIP Gateway Enable: no

18. Click Submit All Changes at the bottom.
19. The Internet and phone LED on the SPA3102 should light up once it has registered with OntheNet.
20. Power cycle the SPA-3102 (disconnect/reconnect power).
21. Test the configuration by dialing the test number 8378 which will connect you to an echo test service if successful (nil charge).


